Layouts
New templates can be added and existing ones can be edited at any time.
Email Layouts
There are several different emails that are sent from the system, both automatic (e.g. order confirmation for online purchases) and manual (receipt or reservation confirmations sent from Box Office). All these emails can be created and edited directly from Box Office in the e-mail layout module which can be found under Administration > Layouts > Emails.
 Add new email template
Click Add mail template in the top right corner to add a new email template. You will be asked to select an existing template to copy from. In the top right corner it is possible to search for the relevant template (e.g. Type Online if you'd like to create a template for online sales) and then click copy behind the template you want to use. You then fill out the required Information and click Save.
Edit email template
To edit an email template, click on the row of the template or use Actions > Edit.

Name
- Template name, only visible internally.
Description
- Internal template description.
Sender (Email)
- Sender email of the email, displayed when the customer receives the email.
Sender (Name)
- Sender name of the email, displayed when the customer receives the email.
Reply to (E-mail)
- The email address to which the recipient will reply, if they choose to do so.
Reply to (Name)
- The name to which the recipient will reply, if they choose to do so.
Category
- Should not be changed
Type
- Defines when an email is automatically sent and in which part of the system the template can be used. When creating new email templates it is very important to copy the correct template type.
Languages
- The email templates can be created in multiple languages that are automatically connected to the online buying flow language.
To edit the contents of the email template click edit for each language you would like to edit.
HTML editor

The template is edited in HTML and it will require some previous knowledge if you would like to create a complete new design. It is however pretty easy to just change text snippets. The text that is black inside the body tags are text fields that you should look for and can edit. When changes are made in the code, it will immediately be visible in the preview window to the right.
For a bit more advanced changes like adding links or images, read more.
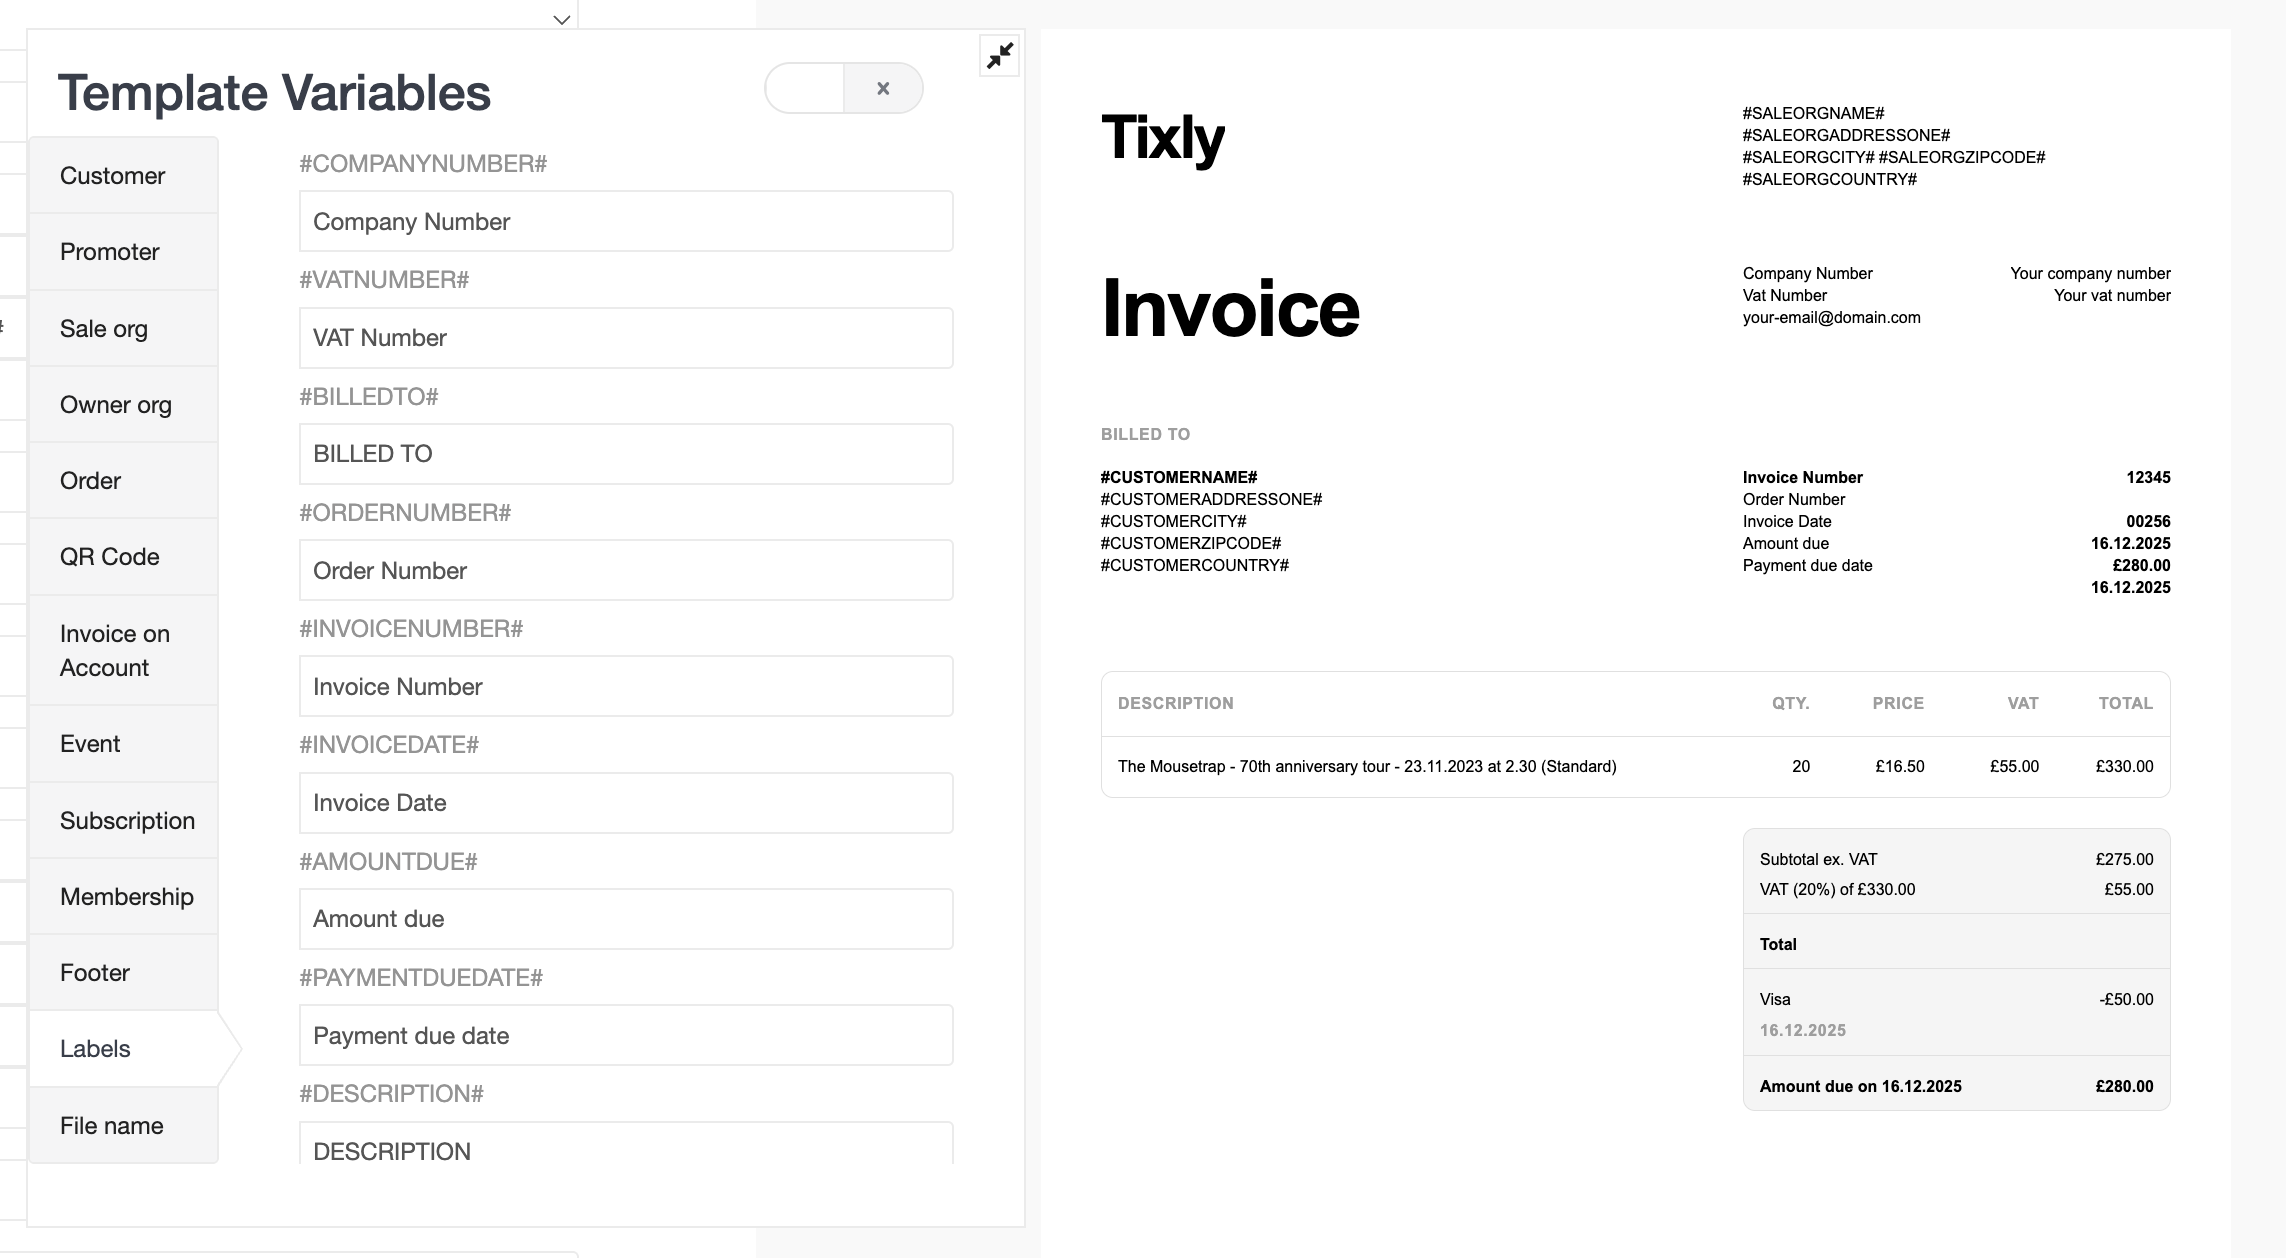
Dynamic variables
The template contains many dynamic variables, e.g. #ORDERID# which will return the actual order id when the email is sent to the customer. A guide of all available variables can be viewed by clicking the T at the top.
The available variables differ per email template.

It is also possible to change what is shown in the preview by changing the content for each variable.
Start and end tags
#EVENT#, #PRODUCT#, #TICKETS# are all start and end tags. This means that everything that is put in between #EVENT# and #EVENT# will be repeated for each event in the order.
Ticket Layouts
The module for ticket layouts can be found under Administration > Layouts > Tickets. There it is possible to edit existing layouts as well as create new ones. To create a new layout, click Add ticket layout in the top right corner. In the next step, choose an existing layout as a starting point for the new one. Give the layout a name and click Save.
To edit the layout, click on the layout you want to edit and then Edit to get to the layout editor.

Inside the module it is possible to edit the existing fields as well as add new images and text elements. To edit an existing element, click on it and edit fields will appear. Depending on type of element these fields can be edited:
Text
- Text field. Can be either hardcoded text or a dynamic variable. In the example above the variable #ENTRANCE# is used which will return the entrance of the seat when the ticket is downloaded or printed.
X
- Position on the X axis (right/left)
Y
- Position on the Y axis (up/down).
Height
- Height of the element.
Width
- Width of the element.
Size
- Font size for text and border thickness for a box.
Position
- Position of the elements. A higher value will be placed on top of lower values.
Rounding
- The rounding of box corners.
Alignment
- Text alignment left / center / right in the element field.
Color
- Font or box border colour.
Background Color
- Background colour of boxes.
Rotation
- It is only possible to rotate barcode elements.
LineStyle
- Line elements can be solid / dashed / dotted.
Image
- Upload the fixed image.
Clicking T in the top left corner will show a guide of all dynamic variables that can be used in the layout. By switching the toggle on it is possible to test what certain variables will look like. When the template is done, click Save layout.
Since the T can be moved around it will not always appear in the top left corner.
Invoice (sale on account) Layouts
Invoice documents are created and hosted in the Layouts > Tickets module. Where and how to use the invoice documents can be found in the Invoice & Sale on Account manual.
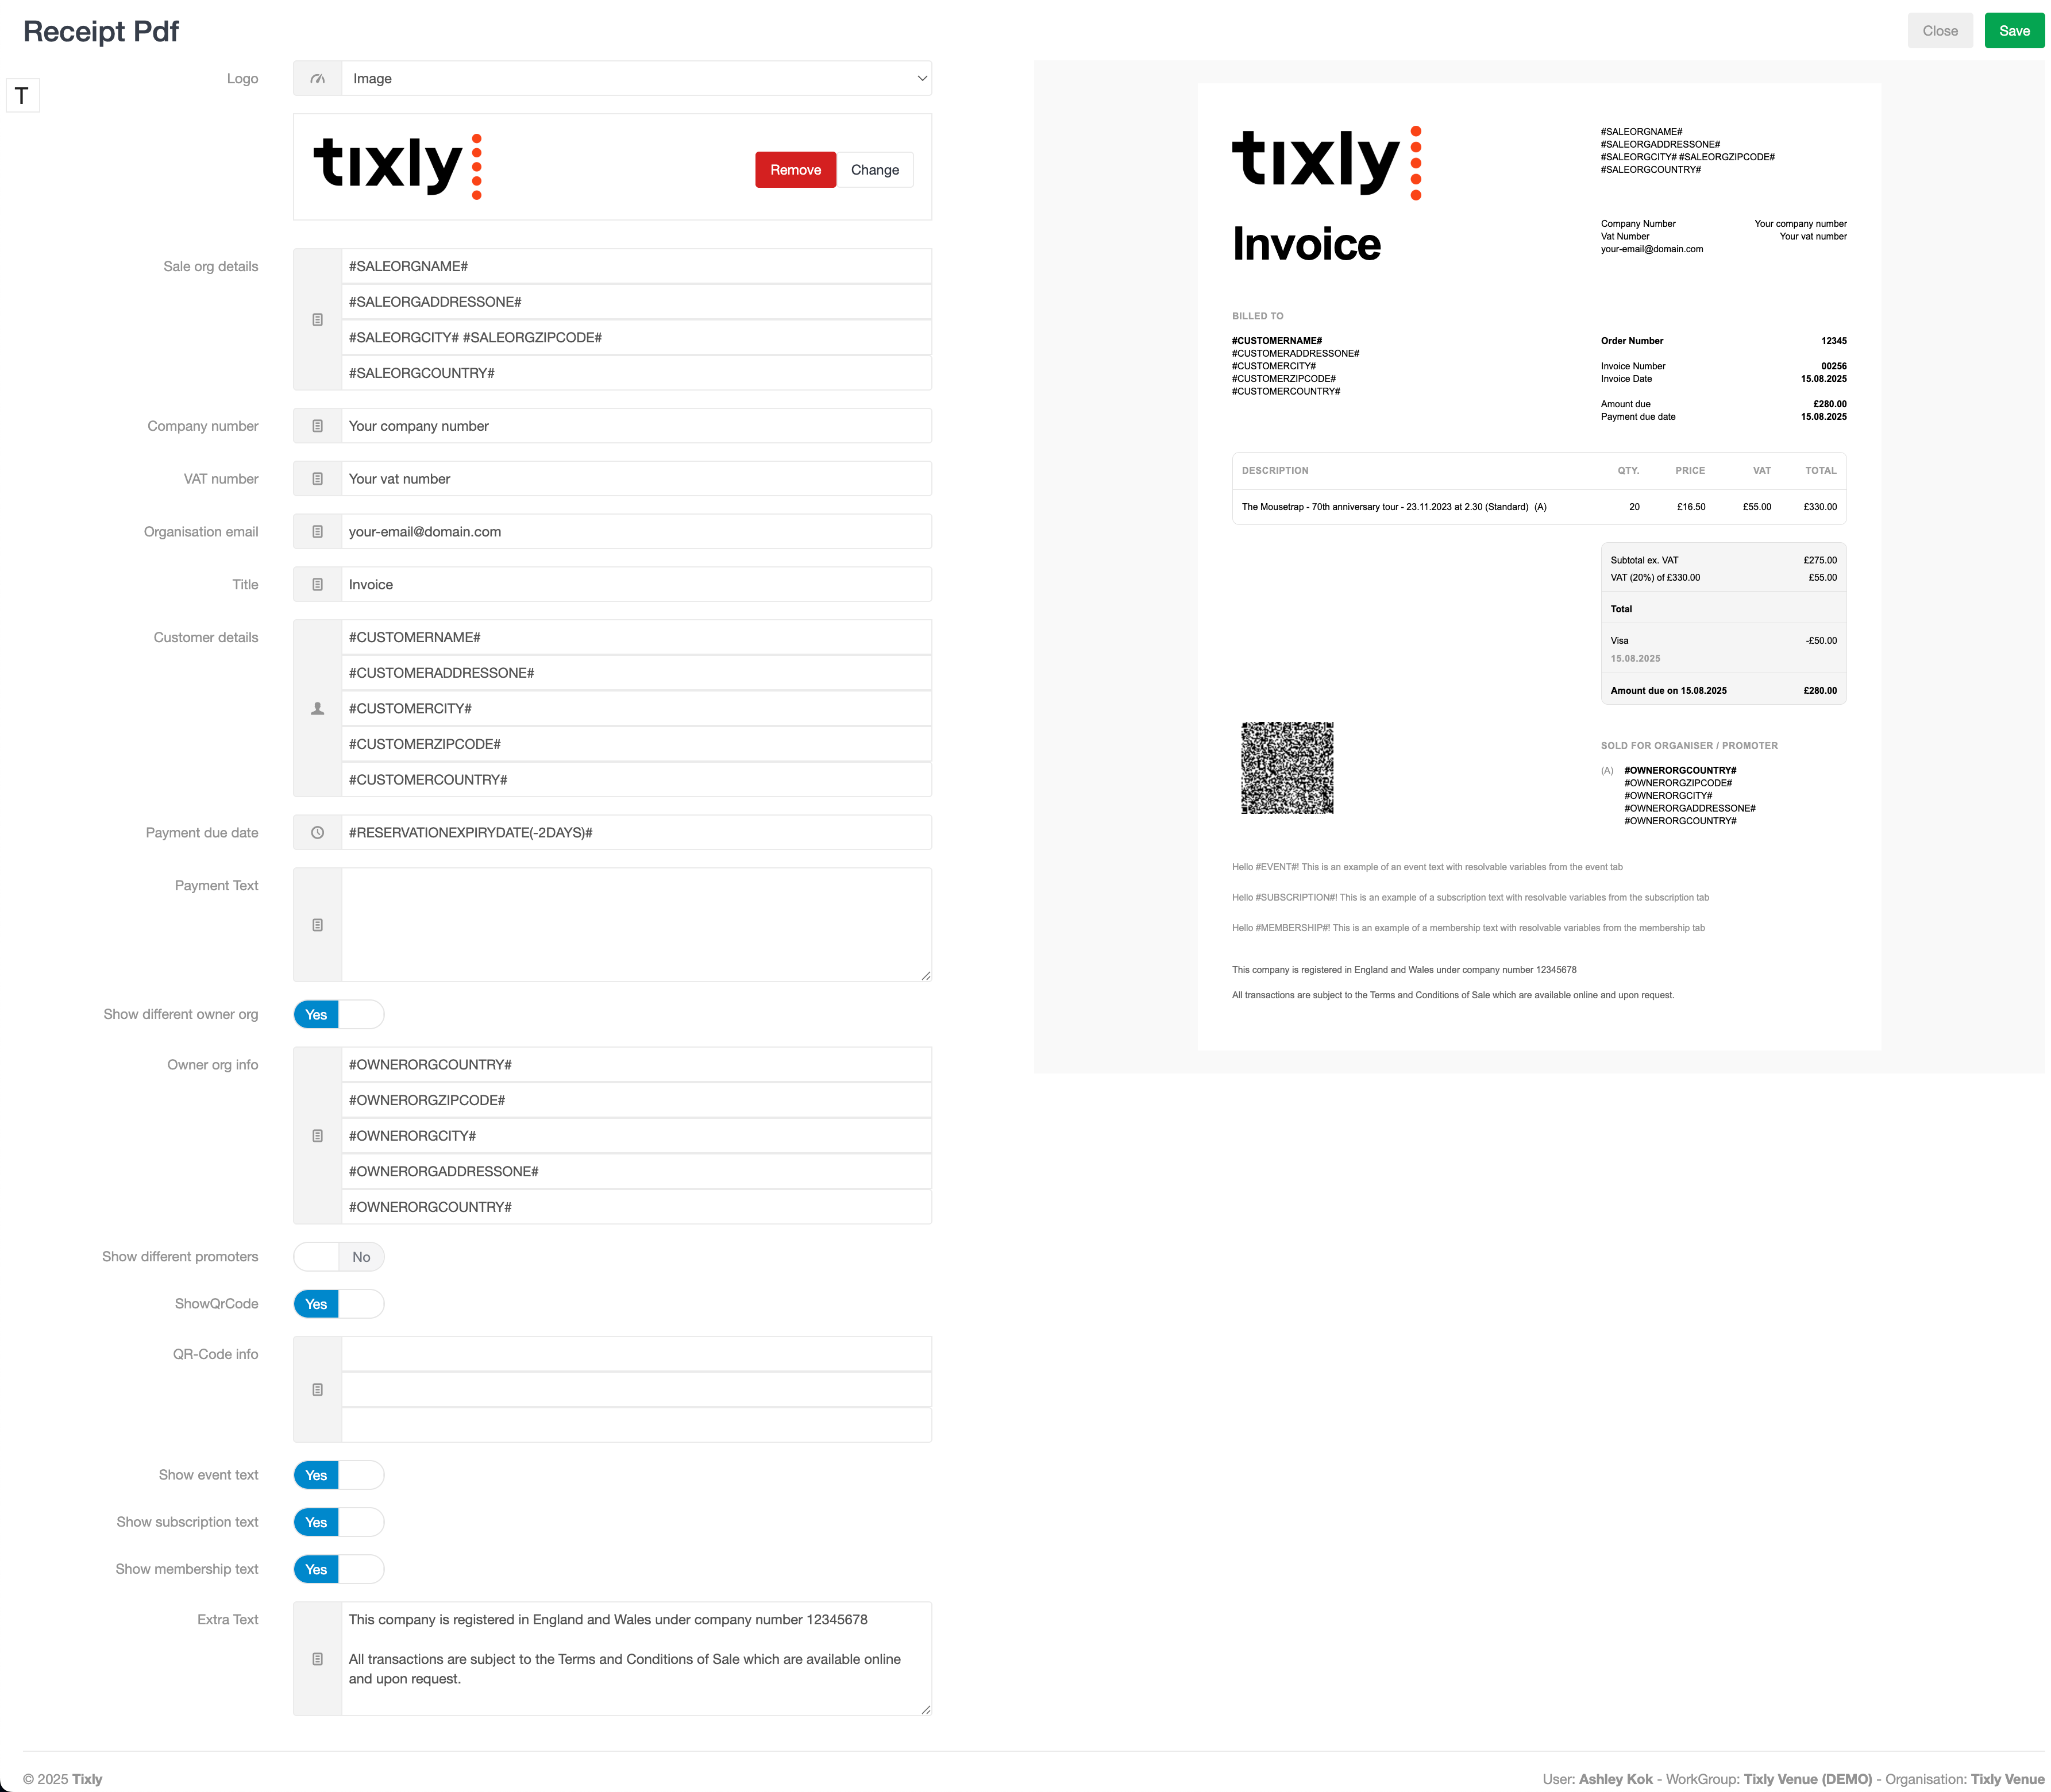
Logo
- Displayed in the top left corner, can either be plain text or an image.
Sale org details
- The sale organisation details in the top right corner can be provided either by filling them out directly or by using variables.
Company number
- Fill out the company number.
VAT number
- Fill out the VAT / GST / TAX number.
Organisation email
- Fill out the email address.
Title
- The title of the document. As the same layout type is used, it can be set as Invoice, Proforma, or Receipt.
Customer details
- Variables can be used to fill out the customer details in a format that makes sense.
Payment due date
- Use the #RESERVATIONEXPIRYDATE# variable to add the payment due date. Use #RESERVATIONEXPIRYDATE(-XDAYS)# if the displayed due date should be earlier, replace the X with the amount of days.
Payment Text
- Open text field that can be used to add extra payment information to the document. This text only shows if it's an unpaid order.
Show different owner org / promoters
- When set to Yes, information about the organisation or promoter for which the order was sold is included. A Sold For Organiser / Promoter section is then added to the document.
ShowQrCode
- It is possible to add a QR code to the document that includes fiscal information.
Please contact local support to see if this feature is available.
- It is possible to add a QR code to the document that includes fiscal information.
Show event / subscription / membership text
- When active on the workgroup, extra text can be added at the event, subscription, or membership level, which can then be displayed on the document.
Extra Text
- Open text field that is added to the bottom of the document.
Labels & File Name
Under the T it is possible to rename the labels on the receipt document and the file name.
Unlike the the other tabs under the T, the Labels and File name tabs actually change definitive data on the document.
Mobile pass
The mobile wallet ticket can be edited in the Layouts > Mobile pass module. Each organisation can have its own mobile pass.
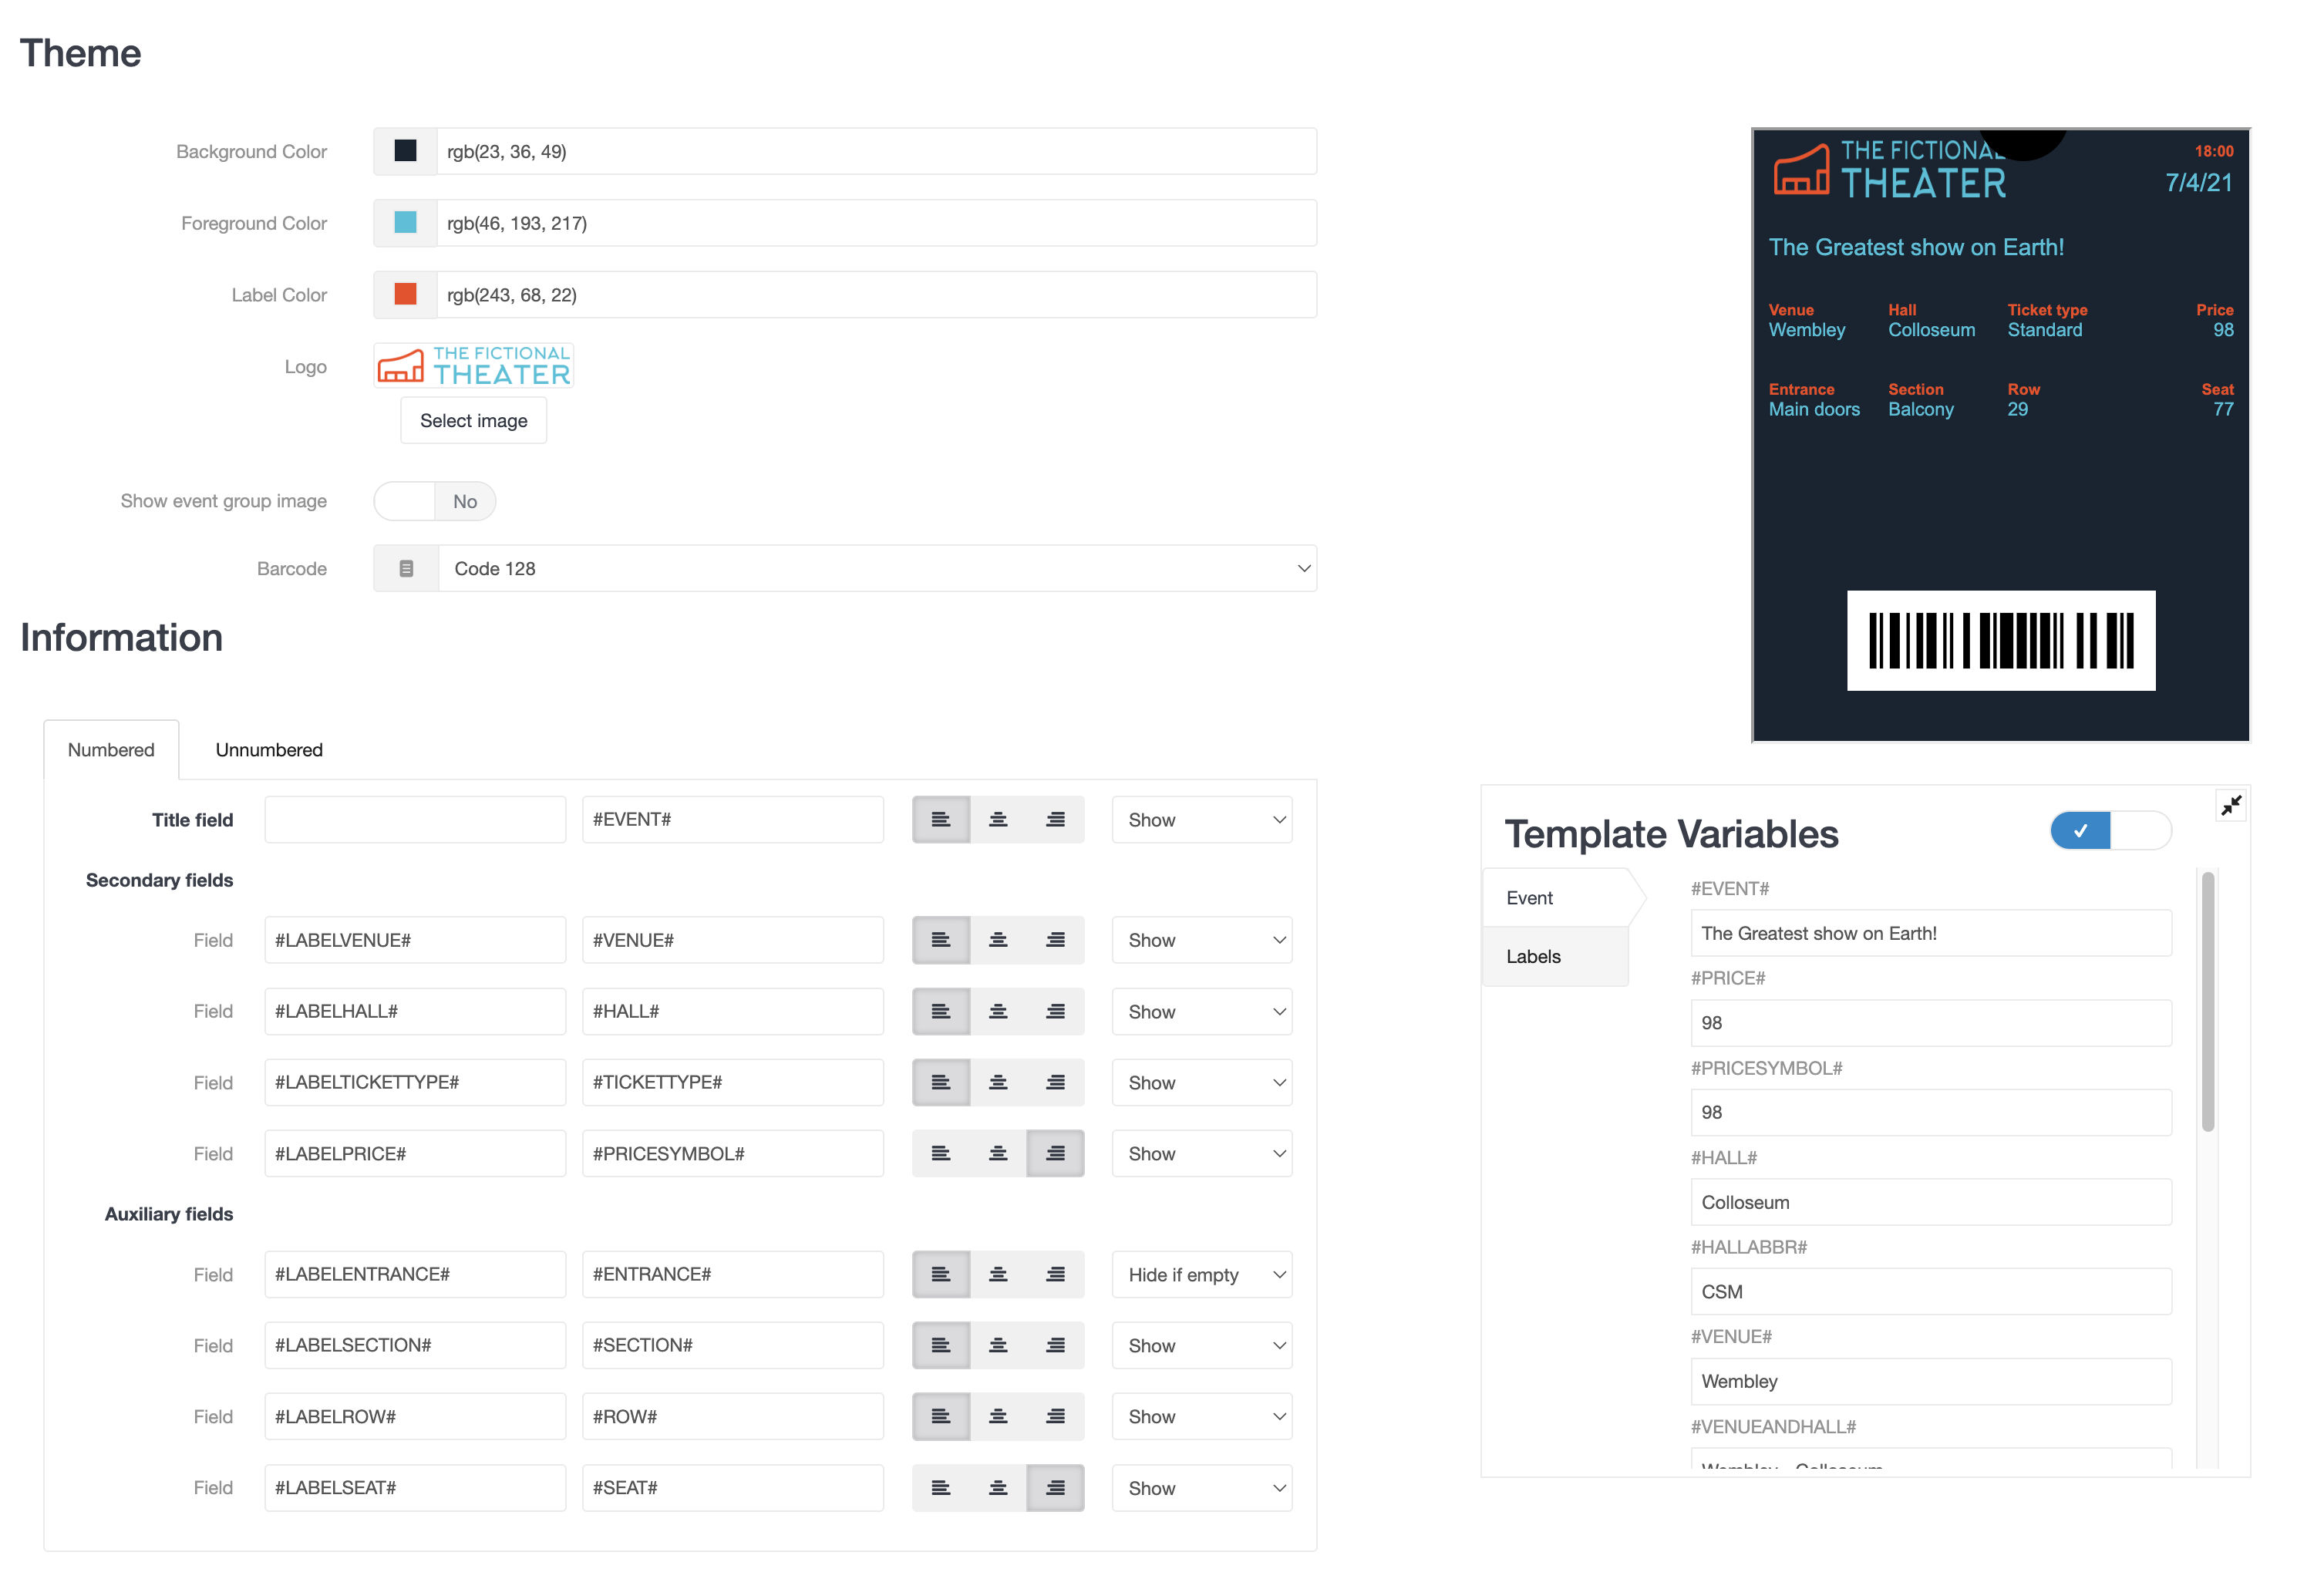
Theme
Background / Foreground / Label colour
- Configure which colours are used for the background and text of the mobile pass.
Logo
- Upload the logo as a PNG file.
Show event group image
- Set to Yes to display the Event group image on the mobile pass. Displaying the image will hide the title field.
- Set to No to display the Event Title, no event image will be displayed on the mobile ticket.
Barcode
- Select whether the mobile pass should use a Code 128 barcode or a QR code.
Information
The fields that are displayed on the mobile pass are configured within the information section. An overview of all available labels and variables can be viewed by clicking the T icon at the top of the section. Furthermore, field alignment (left / right / center) can be set, and the visibility of the fields can be adjusted.
SMS
The SMS template can be created and edited via Layouts > SMS module. Each organisation can have its own SMS template. Clicking T in the top left corner will show a guide of all dynamic variables that can be used in the layout. The #CUSTOMTEXT# variable can be used to create the message under the SMS/Email tab at the event date level.

We recommend using as few variables as possible, as they increase the message length. A single SMS is limited to 160 characters, messages exceeding this limit will be split into multiple SMS messages.


Was this article helpful?
That’s Great!
Thank you for your feedback
Sorry! We couldn't be helpful
Thank you for your feedback
Feedback sent
We appreciate your effort and will try to fix the article